The Best Valentine Hot Cocoa Stirs
We are barely past the Christmas hot cocoa bombs over here and it’s time to begin thinking about Valentine’s Day ideas. I started with the hot cocoa bombs. I know many of you have made hundreds, videoed them, watched you tube versions. Me, too. But, Valentine Hot Cocoa Stirs were truly an accident. I am so excited about this new venture that proved to be a great one!
And the inspiration? Heart silicone molds.
I bought them for another purpose…so stay tuned! But, here they were screaming at me to make a new version of a Valentine Hot Cocoa.
Genius!
I carefully cleaned and dried the molds. Melted my white chocolate coating, which works better for me, and added a spoonful into each heart mold and used a silicone brush to coat the sides.
Turn the mold upside down over parchment paper to let excess out and then scrape off the top of each before chilling for each coating. I chilled them for 5 minutes in the refrigerator. And then repeated the process.
TIPS: make sure that you scrape off the top to make it easier to remove…and cooling the white chocolate slightly helps with maneuvering the second coating.
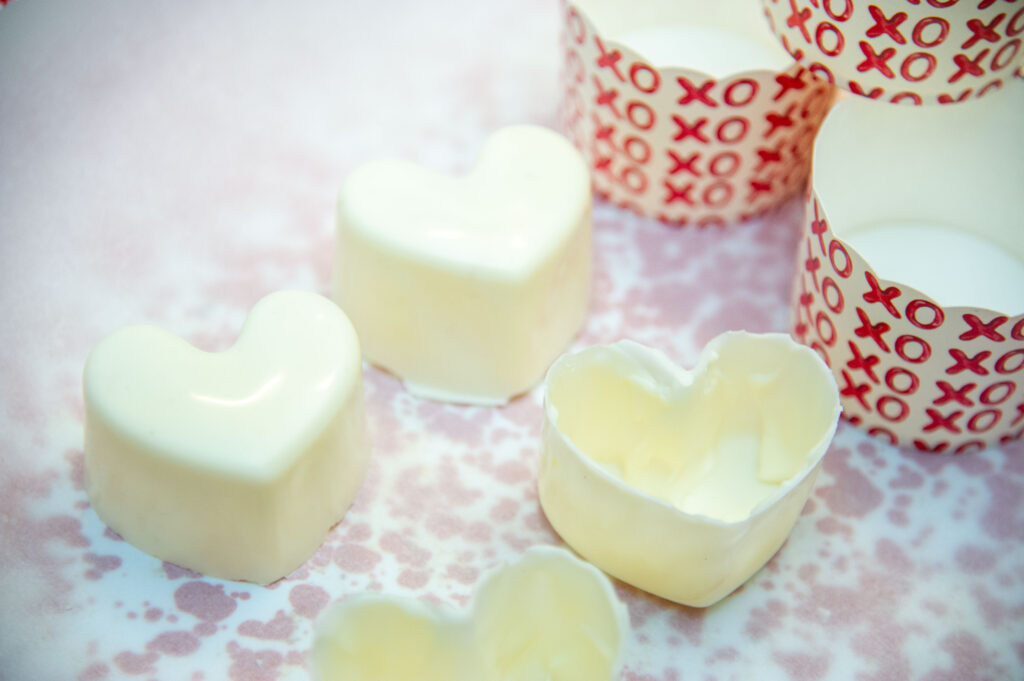
After the second coating was chilled, I pushed each heart from the bottom, letting it free itself.
WARNING: If the white chocolate is over the edge on the center of the top, you may have breakage getting them out. No worries, temper that discarded chocolate and make them again.
You know what I love about this version?
You don’t have to melt and level the top of the hot cocoa stir shell like you do with the bombs.
What?!!!
Or try and fit them together…Loved that!
Next, you add your hot chocolate mix (and mini chocolate chips if you like). Add a straw into the center. With some, I did add the straw after the white chocolate was poured on, but learned I liked adding them BEFORE the white chocolate was added.

NOTE: I make life easier and buy the large containers of the hot chocolate mix at Sam’s.
It’s a favorite and much easier than mixing all of the fabulous great chocolate mixtures. Believe me–with the white chocolate and mini chocolate chips, it was over the top decadent! Feel free to fill with your favorite here!
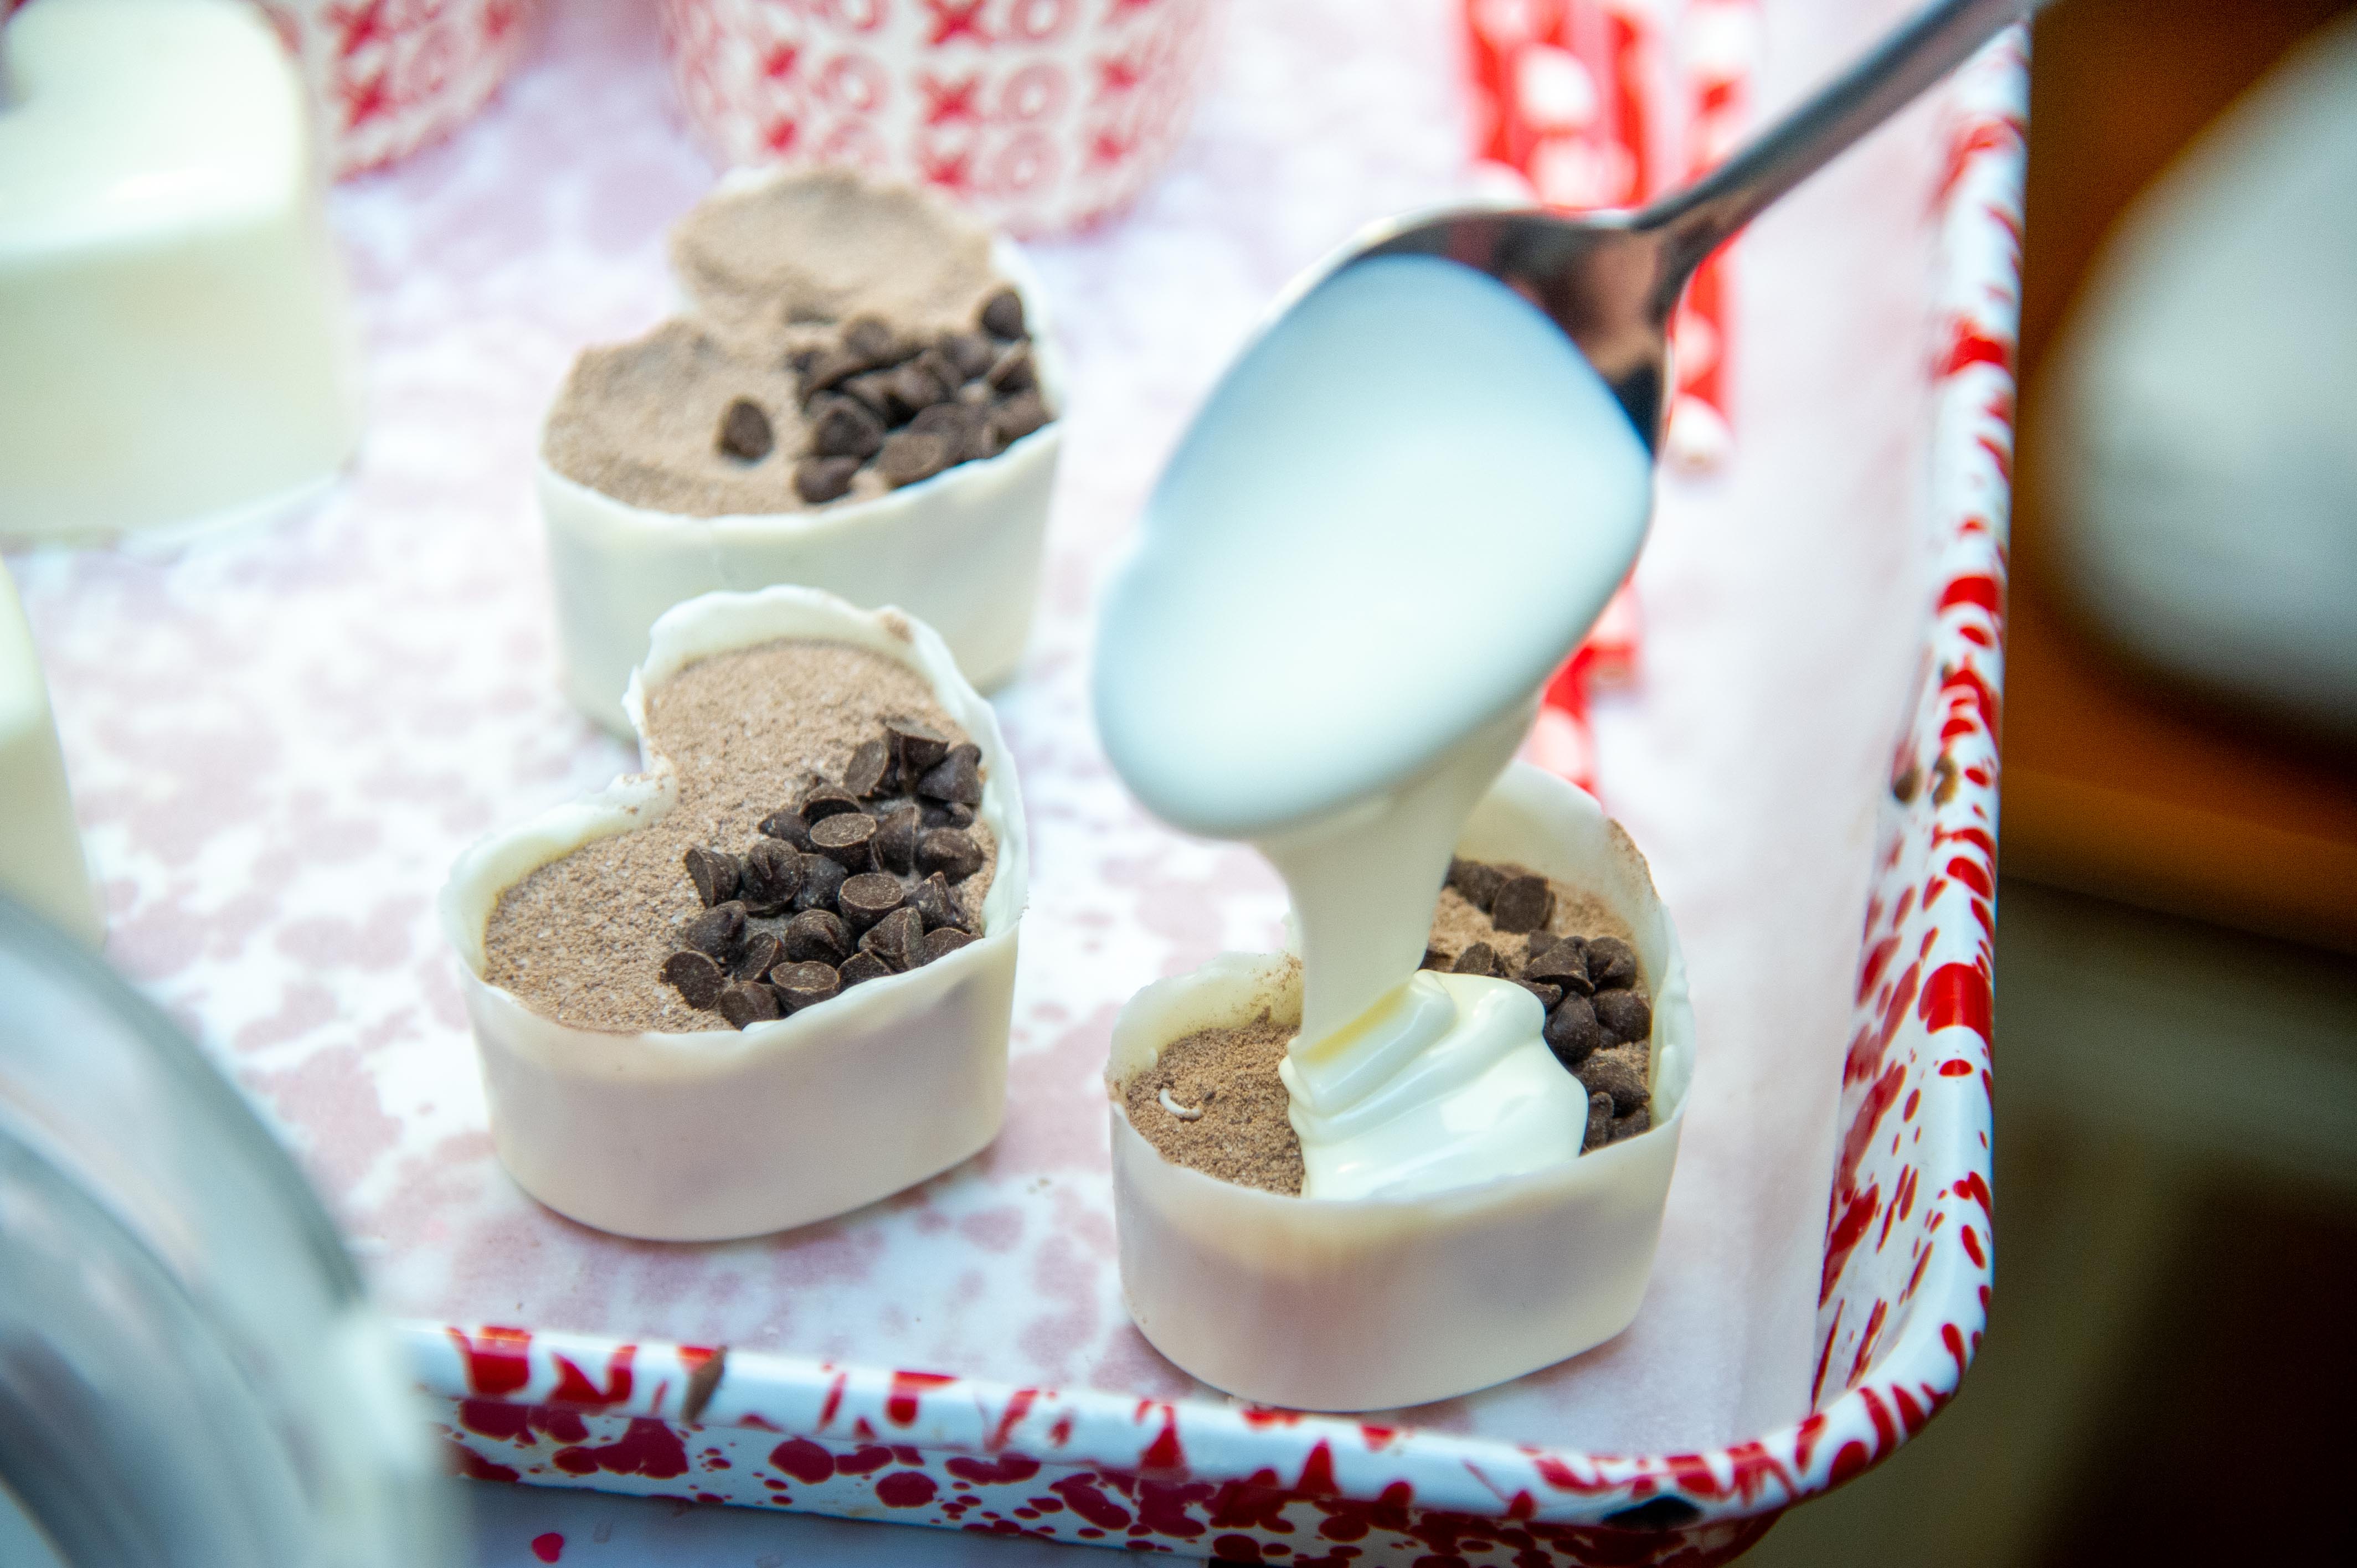
I left enough room in the top of each to spoon melted white chocolate sealing the hot cocoa in.
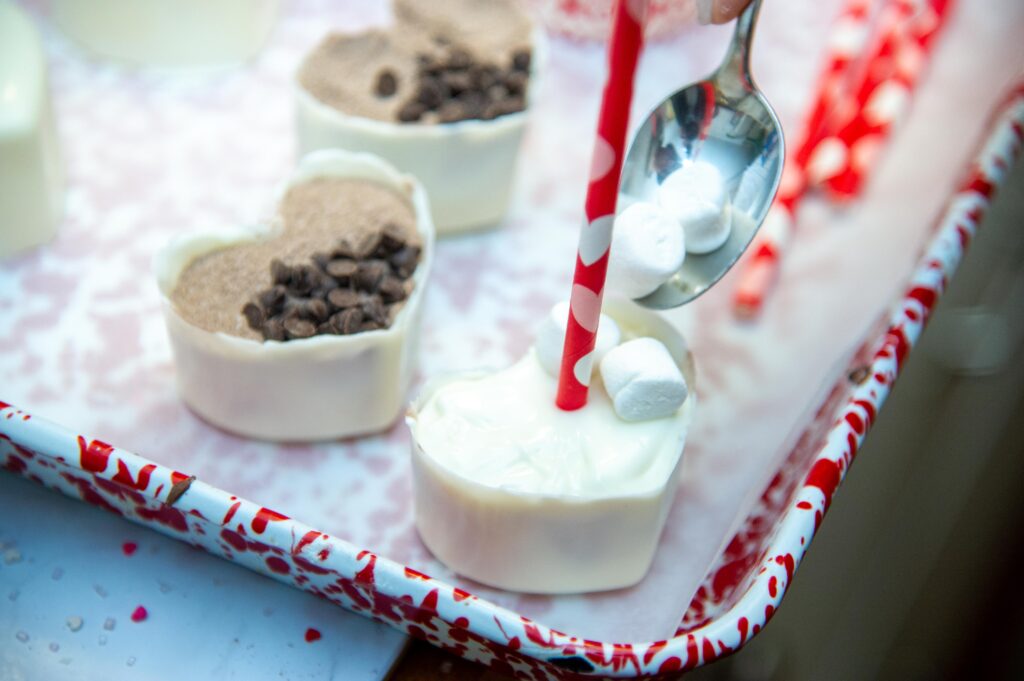
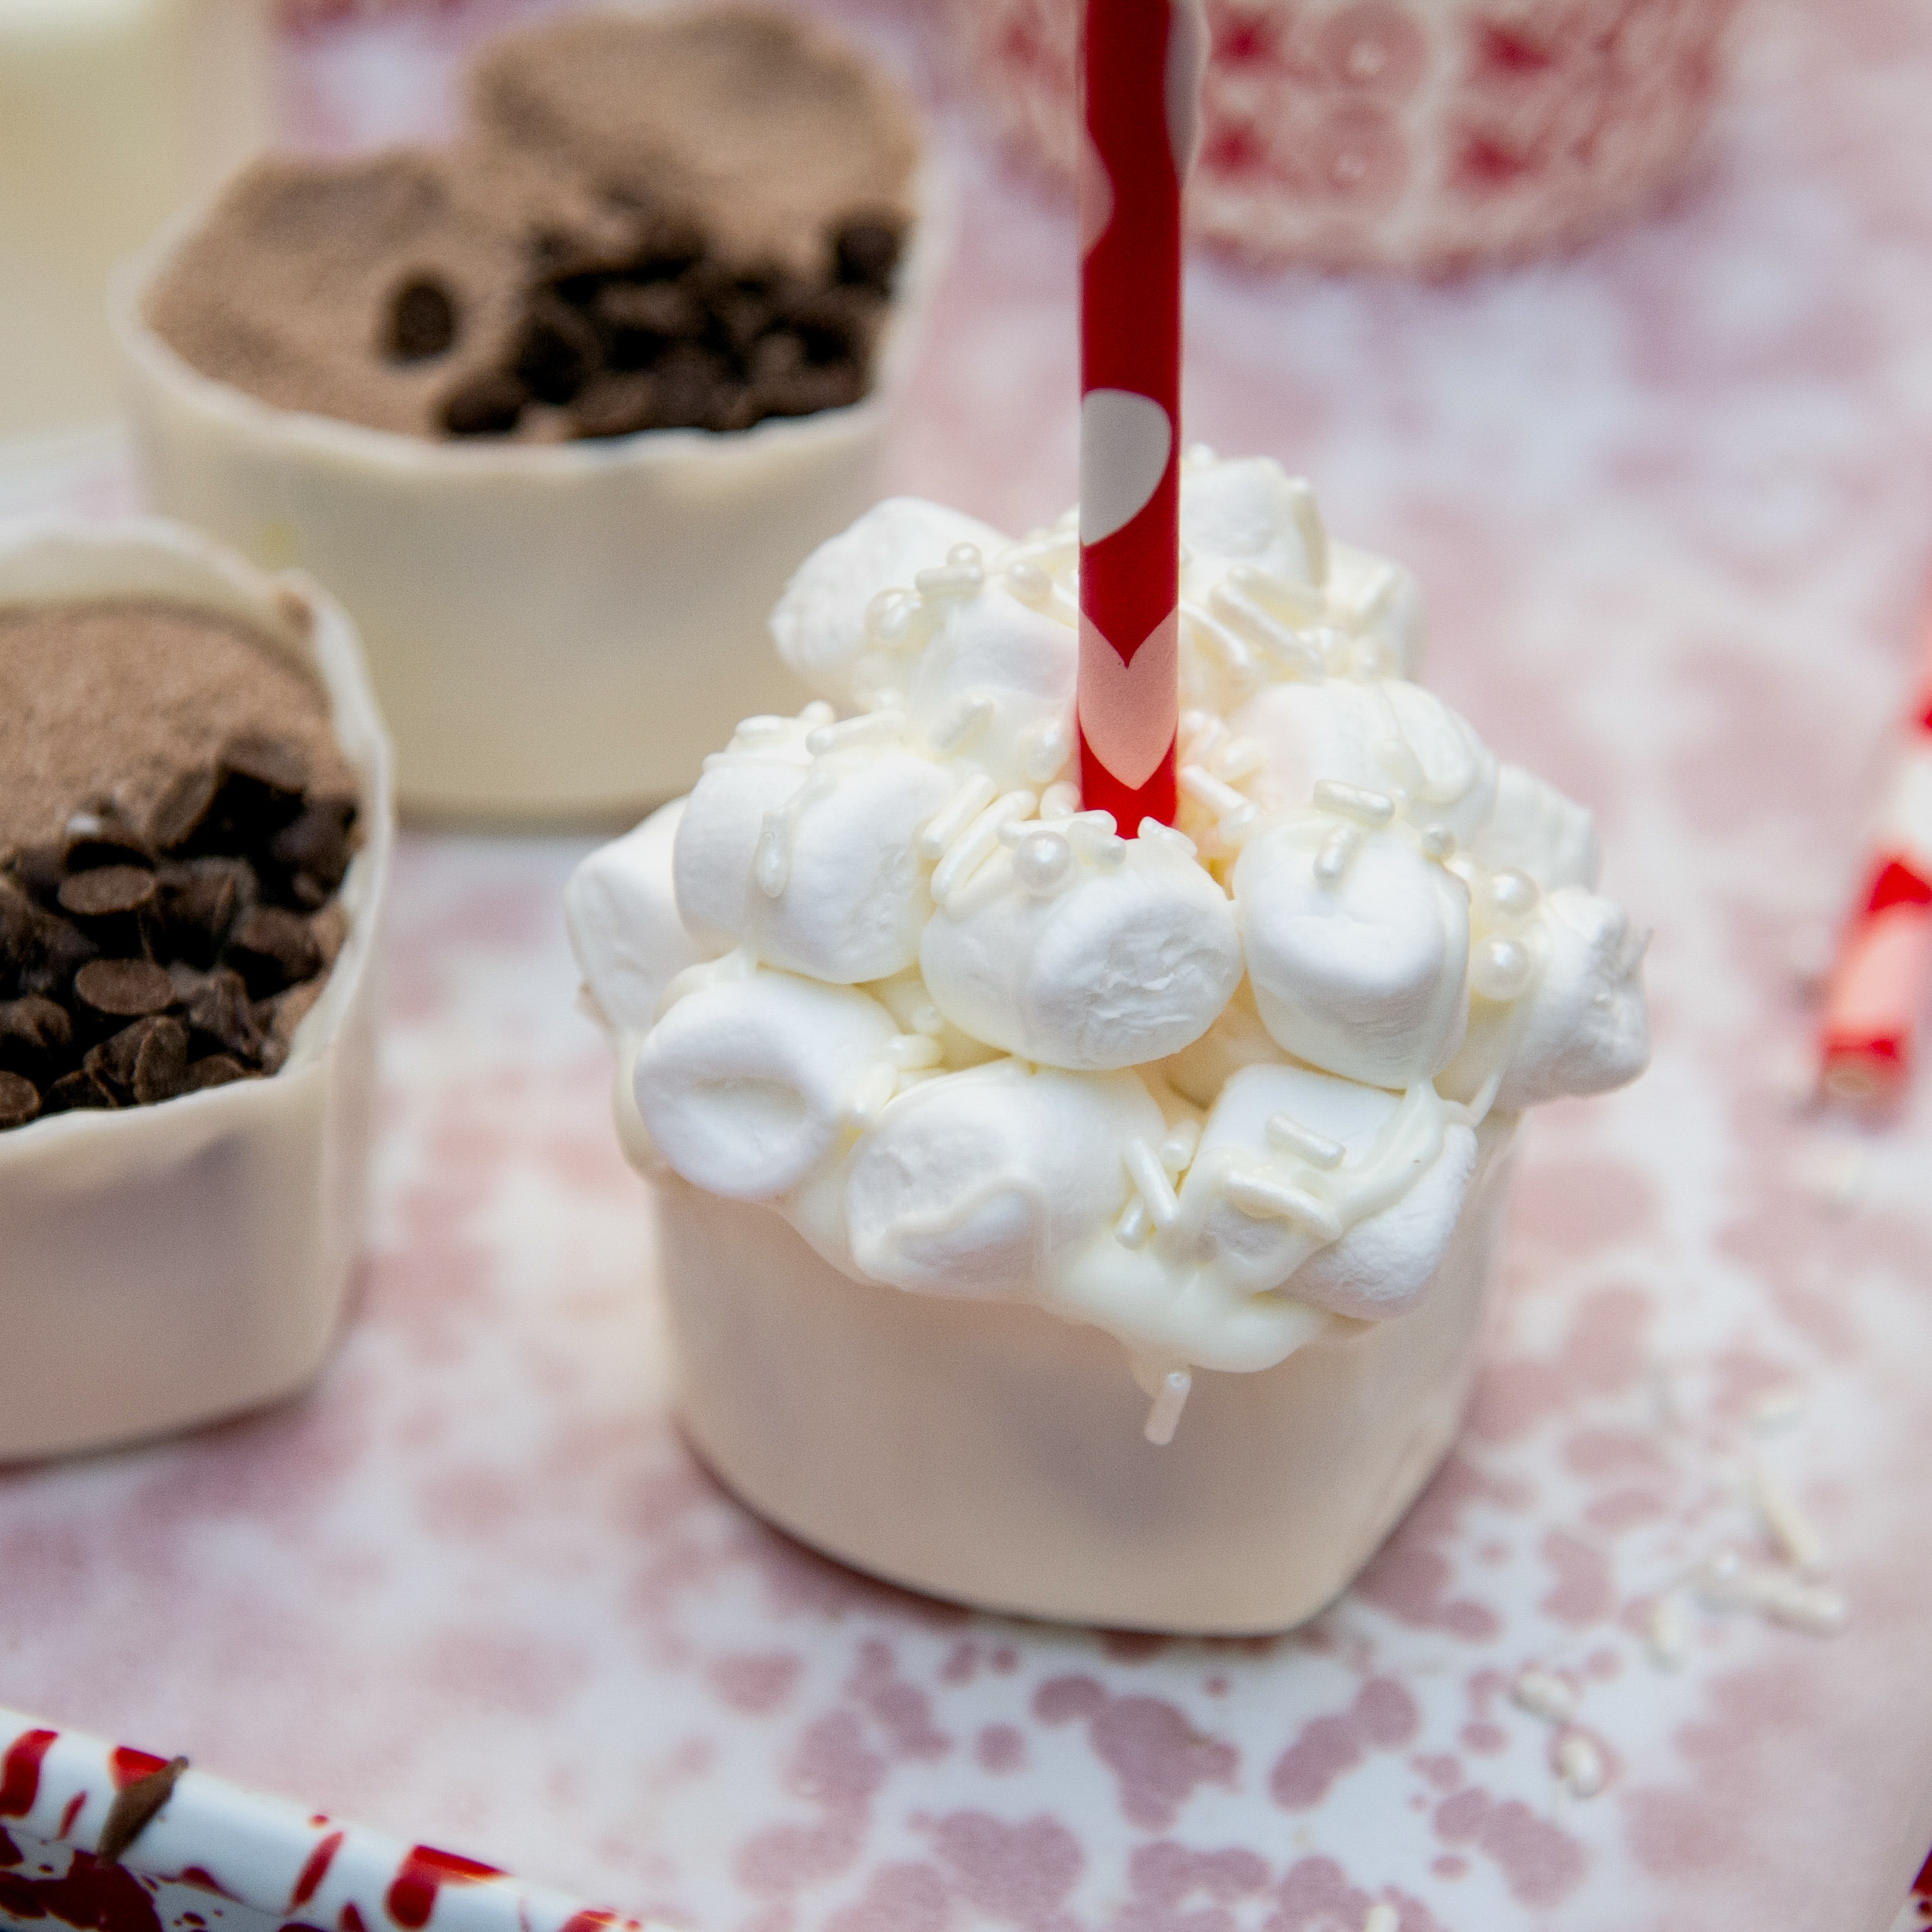
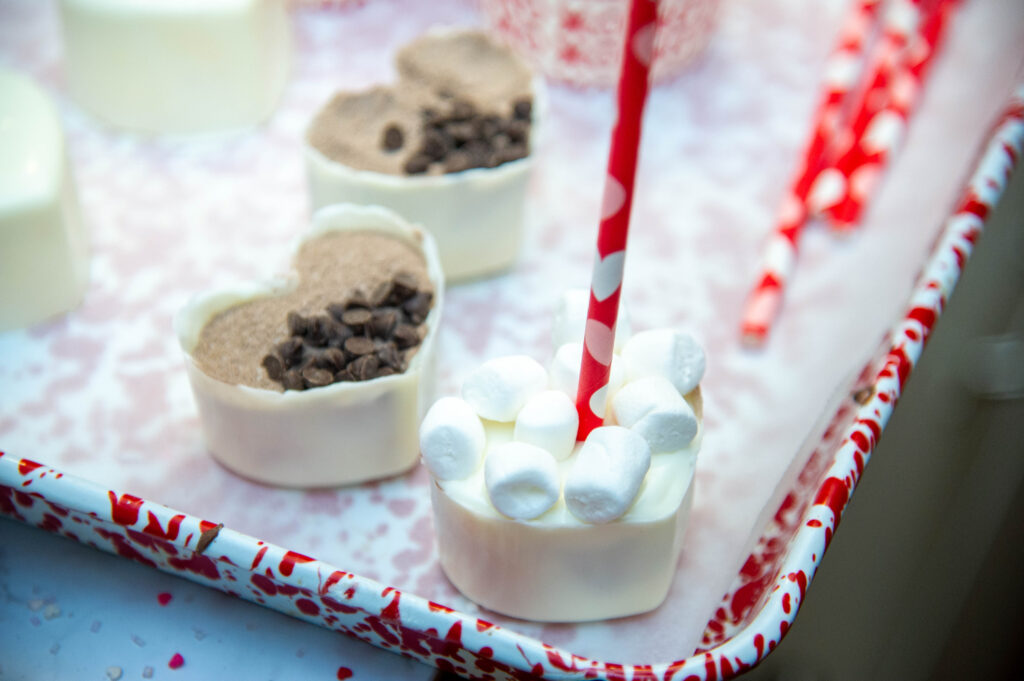
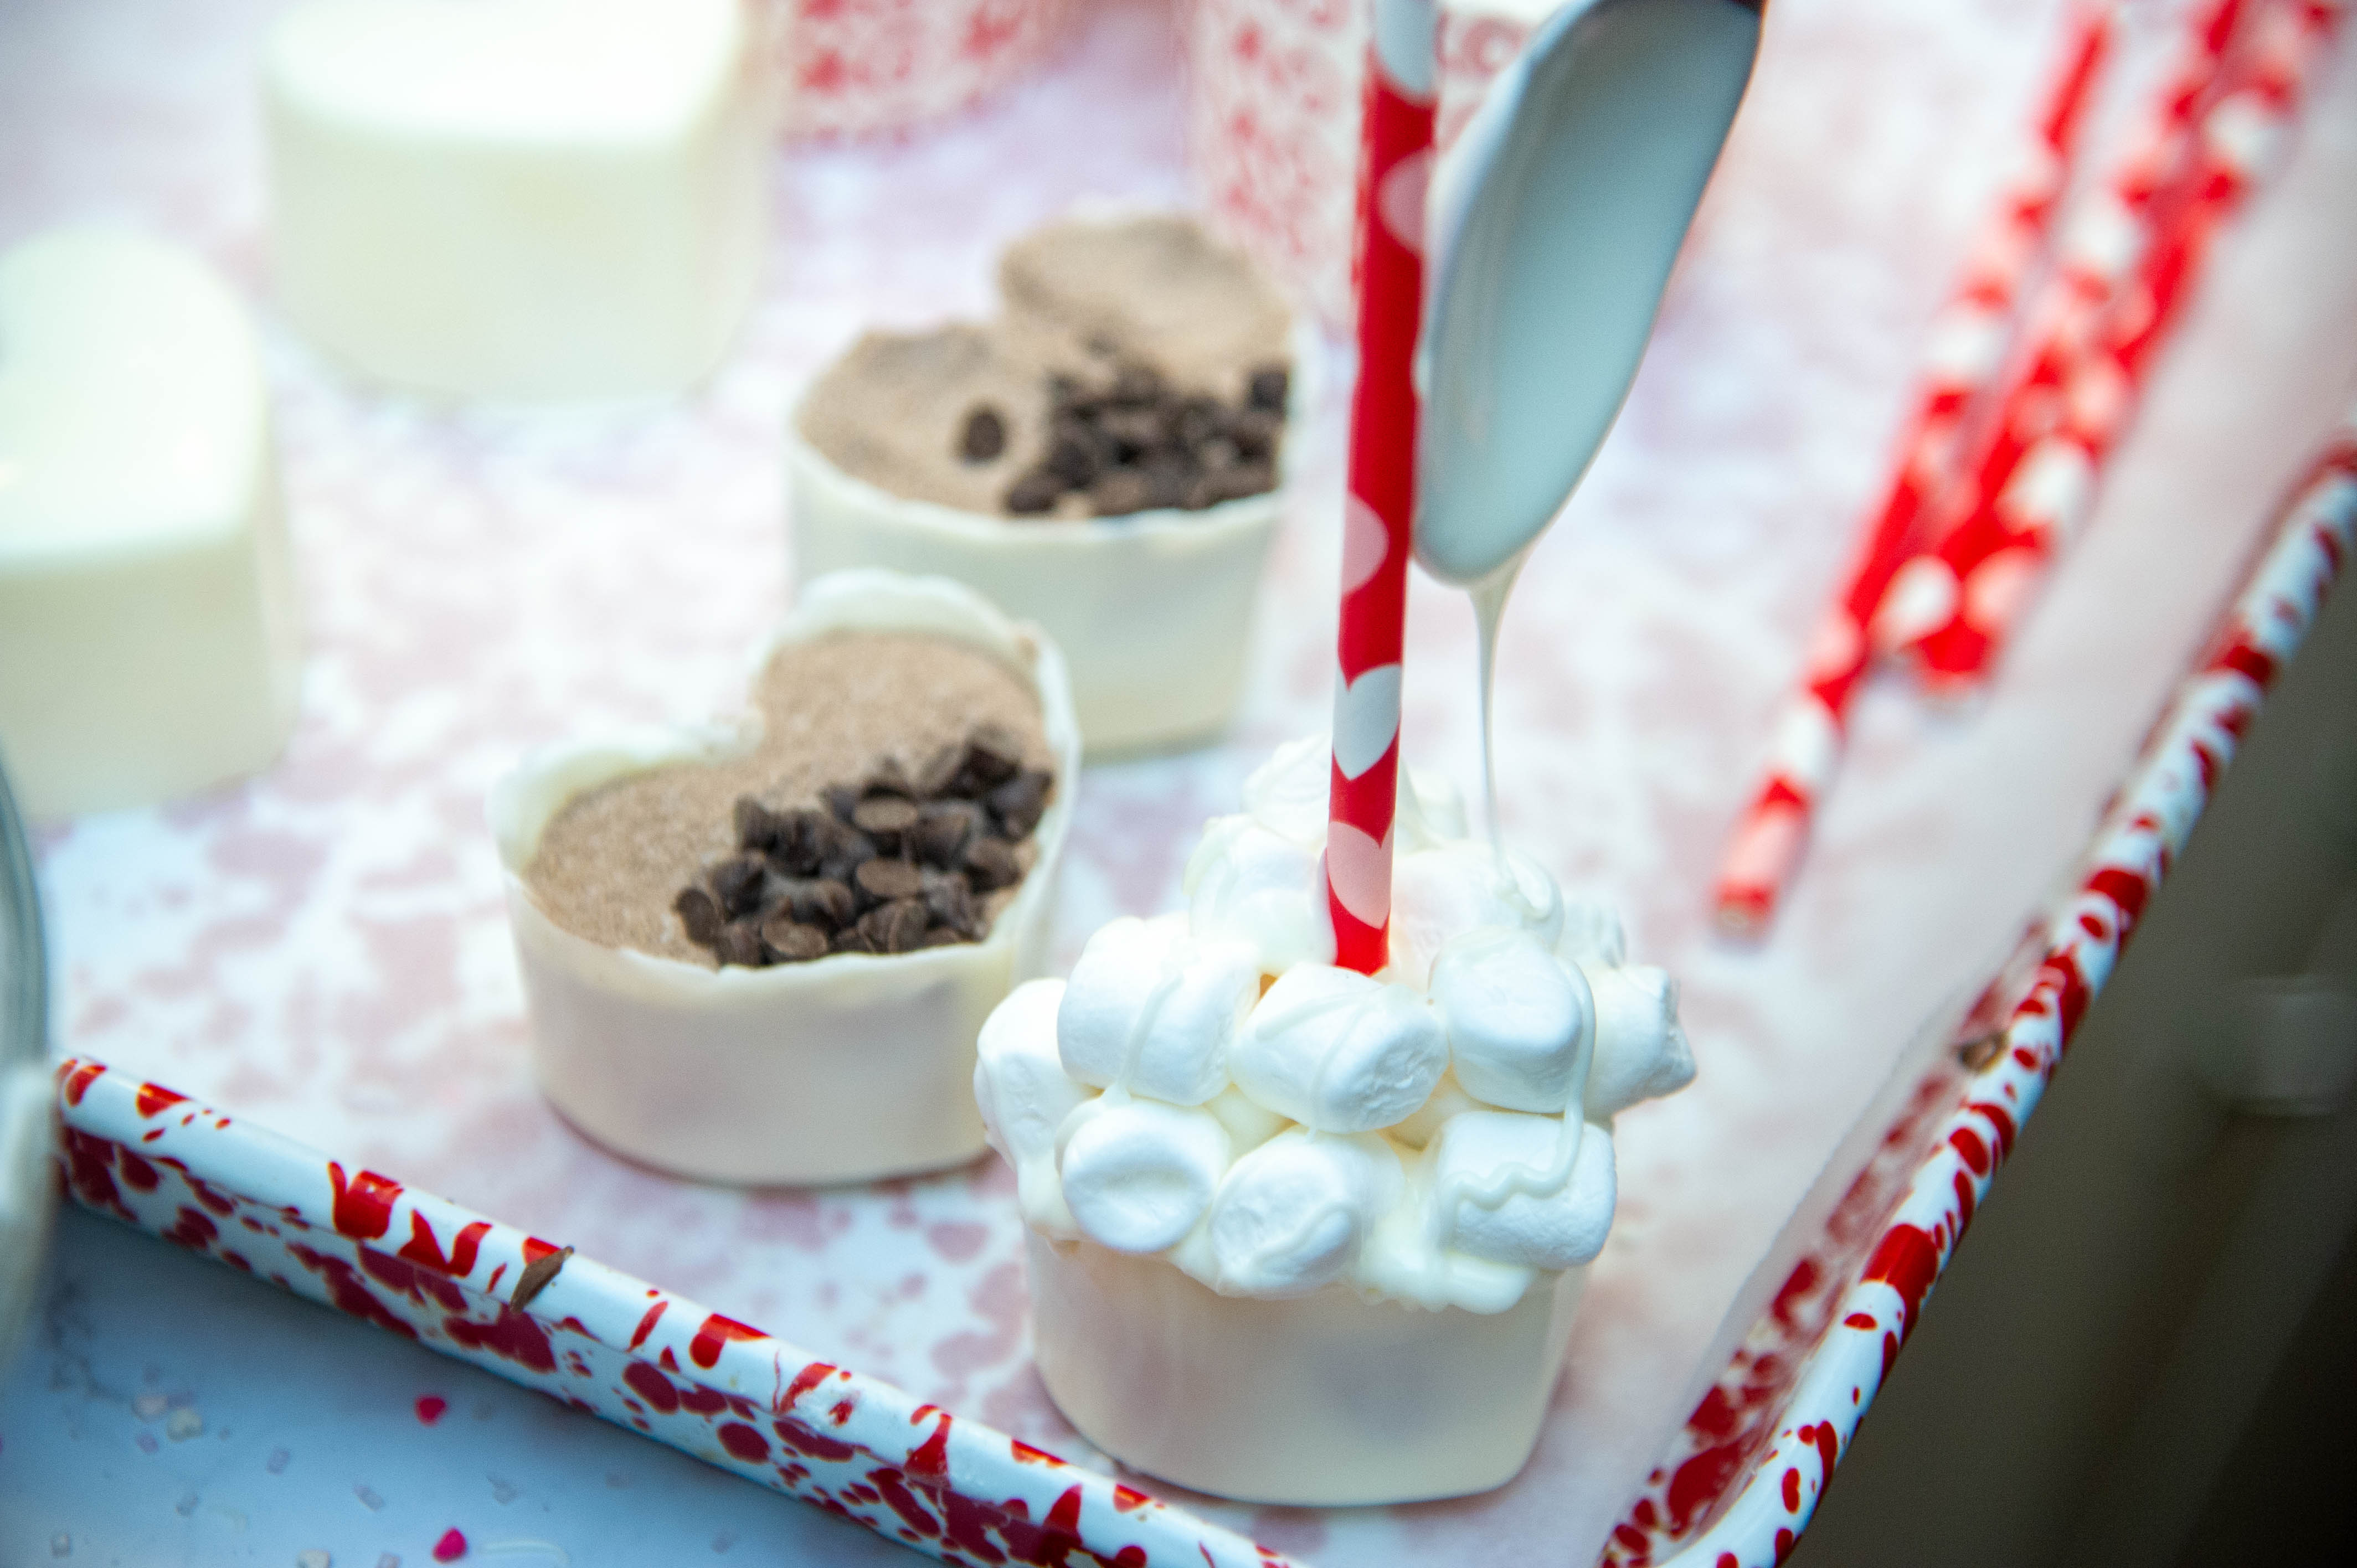
Next, add miniature marshmallows covering the top of the melted chocolate. Keep adding more marshmallows by dipping them into a little melted chocolate to “glue” them onto the mound.
Drizzle with a little melted white chocolate and sprinkle with your favorite valentine sprinkles.
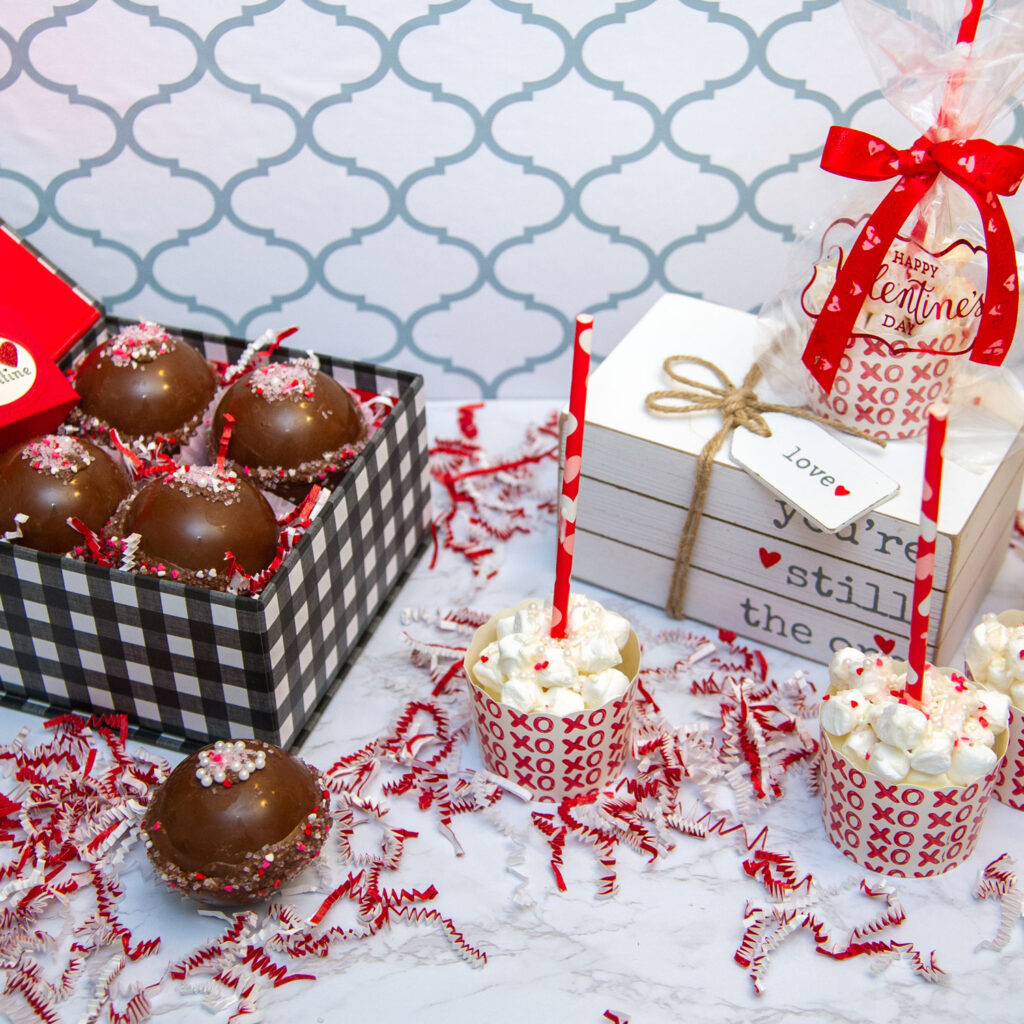
I added them into a cupcake liner, slipped them into a plastic gift bag and added a bit of ribbon for gifting.

And aren’t they the cutest?
Can I tell you that when we poured 8 oz. of hot milk over them, they were intensely amazing? Decadent.
The straw acts as the stir to make sure that the cocoa and miniature chocolate chips and white chocolate were melted.
My favorite version of a hot cocoa bomb yet.
So much easier. Great results.
I love when my imagination brings something that exceeds my expectations! Don’t you?!!
I found my molds and cupcake cups at Home Goods, and straws, bottle labels and bags at Hobby Lobby, so that is a great place to look, too. I’m listing items similar to those I used below for your shopping convenience and some links may be affiliate links:
Valentine Straws for stirs
Valentine’s Hot Cocoa Stirs
Equipment
- silicone heart shaped molds
- silicone brush
- parchment paper
Ingredients
- white chocolate melts or candy coating amount of chocolate will depend on number and size of molds
- hot chocolate mix amount varies based on size of molds
- miniature chocolate chips
- miniature marshmallows
- valentine sprinkles
- straws
Instructions
- Temper your chocolate melts or candy coating either in the microwave in 20 second increments or in a bowl or low simmering water. CAREFUL: any moisture in chocolate will cause the chocolate to seize and not temper.
- Make sure that your molds are clean and completely dry.
- Based on the size of your molds, add enough melted chocolate into the mold to cover the bottom and sides to the the top, using a silicone brush to move the chocolate.
- Turn the mold over onto parchment paper to pour out excess chocolate and then scrape the top with a straight edged spatula.
- Chill in the refrigerator about 5 minutes until the chocolate has set.
- Repeat the coating, making sure all parts are covered. NOTE: it is easier to wait until the chocolate has cooled a bit before coating a second time.
- Set chocolate again.
- Carefully push the mold from the bottom, making sure that the part dividing the two sides of the heart is pulled away. BE CAREFUL. Not all hearts may make it without breaking. The center section may be a bit tricky. No worries. Toss the chocolate back in and redo if that occurs.
- Add hot chocolate mix to nearly the top with a few miniature chocolate chips added, if desired.
- Insert a straw into the center of the mix.
- With a spoon, add melted chocolate over the mixture to seal in hot chocolate mix.
- Insert miniature marshmallows over the top, adding more chocolate to more marshmallows to mound around the straw.
- Drizzle with a tiny bit of melted white chocolate and top with your favorite sprinkles.
- When set, I added them to valentine cupcake cups and inserted them into plastic bags decorated with red ribbon.
- Add a tag with instructions: Place Valentine Hot Cocoa Stir into a mug. Pour over 8 oz. or more hot milk, as desired. Stir mixture until dissolved.
Notes
You will be the hit of Valentine giving with these! I’ve already got mine ready to prepare for littles who may stop by to celebrate a bit early.
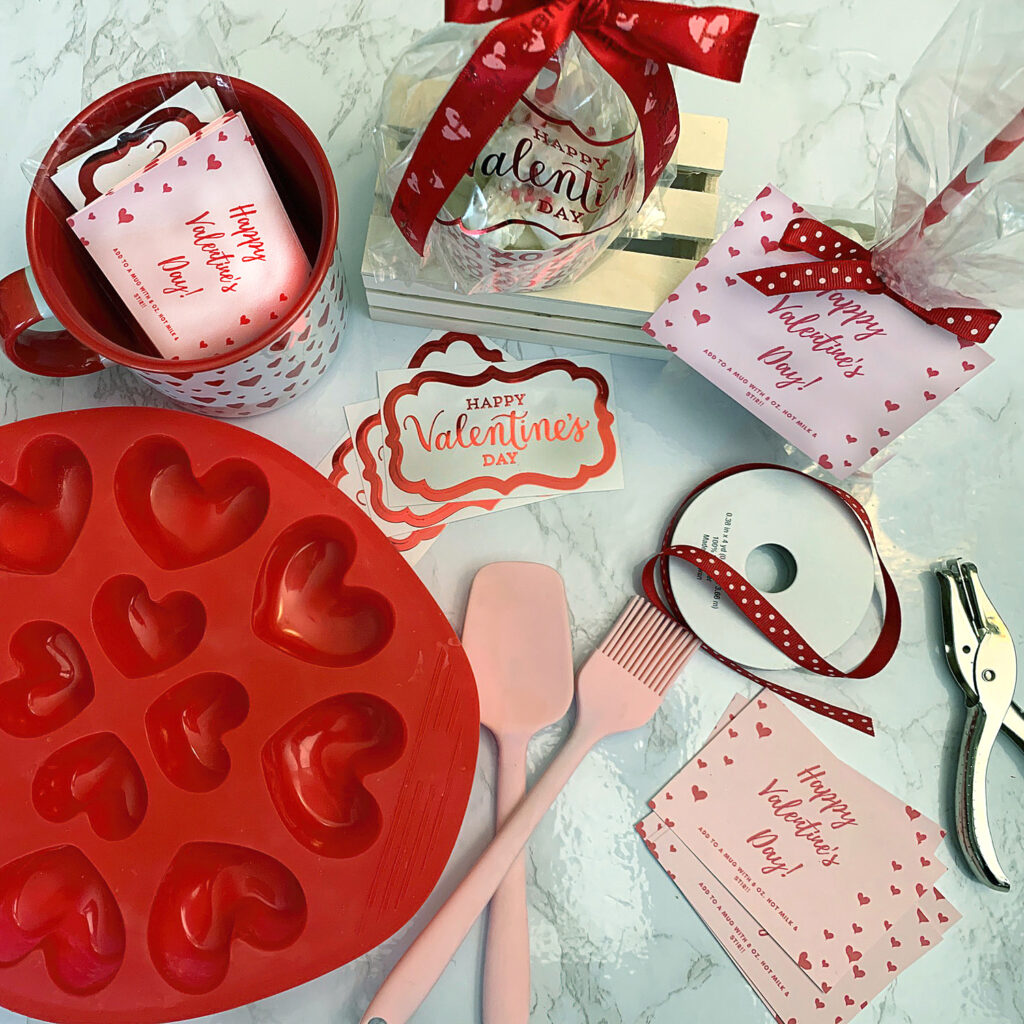
Here’s a photo of my silicone molds, stir and brush…and the bottle labels, straws, cup cake cups, bags, ribbon and tags (created with canva).
You guys! Can I tell you how happy this new creation made me?!!!
I simply love these. With my current nutritional plan, I won’t be consuming these, but tasting them for this post was divine…and gifting these has already begun!
Hope you will love Valentine hot cocoa stirs as much as I do! Don’t forget to pin these on your Pinterest board and follow me there!
My friend Kippi has gathered some favorite bloggers (yours and mine!) to bring you lots of Valentine’s Day Inspiration. With all these amazing ideas you are bound to walk away with tons of ideas!
Next on the tour is Kirsten at tribeofburton.com! Hope you will join her and the rest of these great bloggers!

Kippi at Home // Feet Under My Table // Tribe of Burton // Zucchini Sisters
♥ ♥ ♥ ♥ ♥ ♥ ♥ ♥ ♥ ♥ ♥ ♥

Olivia O’Hern // Decorate and More with Tip // The House on Silverado // My Family Thyme
♥ ♥ ♥ ♥ ♥ ♥ ♥ ♥ ♥ ♥ ♥ ♥

Chas’ Crazy Creations // From Farmhouse to Florida // Simple Nature Decor
Happy Valentine’s Day a bit early to all of you!


70 Comments
Anna Travers
Great idea…looks delish!
Leslie J Watkins
Thanks Anna. They truly are decadent!
Leslie J Watkins
They are decadent, Anna! You need to try them!
Vickie Ramey
Wish my favorite chef was in my kitchen! Looks divine!
Leslie J Watkins
You and Rhea have to try these with your littles! So cute and so much fun!
Paula@SweetPea
What a great Valentine’s Day idea! I love that the straw is attached to the heart so you can stir it while you wait for it to explode. I’m sharing this on my FB page this evening!
Leslie J Watkins
Thank you, Paula! I was so excited when I came up with the idea! The cutest ever! Right? Thanks for sharing, friend!
Misty
Leslie, these are absolutely adorable! What a great idea, thanks for sharing. XOXO
Leslie J Watkins
Can’t wait for you to try these!! Enjoy!!
Jayne
Oh, Leslie! What a fab Valentine’s Day drink recipe! They look so delish, who wouldn’t want to make these? P.S. great idea to make in advance for the littles too!
Leslie J Watkins
I think you will love them!! Especially if they are old enough to help! Have fun!
Pingback:
Pingback:
Pingback:
Pingback:
Kippi
Yummy! These Valentine’s Hot Cocoa stirs are perfect for gift giving and for keeping a few to enjoy. Happy Valentine’s Day,
Kippi
Leslie J Watkins
Thanks, Kippi! And thank you so much for putting all of the hop together!
Maria
I love anything related to chocolate and marshmellows and hot coco recipes, I am going to try this,what a great ideas using stirs.
Leslie J Watkins
I know, right?! So glad you like them. Can’t wait to hear how yours turn out! I am ready to make them again. Mine have all been gifted!
Pingback:
Pingback:
Kimberly Jones Snyder
Oh my gosh, Leslie! these look fantastic! I can’t wait to try to make them! thank you for sharing! your photography is beautiful!
Leslie J Watkins
Thank you!! They are soooooo good! Hope you enjoy them!
Chas Greener
Those look and sound amazing. I’m thinking my daughter will love these, I’ll be sure to share this with her.
Leslie J Watkins
They were so decadent and easier than the bombs I made! Hope you love them!
Niky
These are fabulous! I made hot cocoa bombs at Christmas and the kids loved them. You’ve inspired me to try some for Valentine’s Day, too!
Niky @ The House on Silverado
PS. I’d LOVE for you to share this at my Sundays on Silverado link party, which opens tomorrow!
Leslie J Watkins
Thank you! This was soooo much easier than the hot cocoa bombs! Hope you enjoy them!
Leslie J Watkins
Niky! I’d love to share on your Sundays on Silverado—let me know how to do that!!!
Olivia O'Hern
These hot chocolate bombs are so precious! I really like the idea of the stir and just filling in the top, making those spheres is so hard. Will definitely try. Thank you for sharing.
Leslie J Watkins
I know! These were genius! Sooooo much easier than making those spheres. Enjoy!
Christy
I can’t wait to try these with/for my granddaughter. She is a hot chocolate connoisseur before the age of 4.
Leslie J Watkins
How precious! I will warn you they may be a bit rich for that four year old!! lol
Rebecca
Leslie, I love that you created your own easier to make version of hot cocoa bombs! I’m all about easy projects 🙂 They look fantastic, and I’m sure they taste just as good! It was fun to “meet” you on this hop!
Leslie J Watkins
Easier, for sure! I know, right?! Thank you and I hope you will try these. Loved meeting you for the hop, too!
Kim Waldorf
These look so yummy! What a fun Valentine addition! Thanks for sharing. I think I will try these for my family celebration.
Leslie J Watkins
They are the perfect Valentine celebration drink! I need to make these again…mine have all been “gifted”!
rachelle
Leslie, these are the sweetest little chocolate bombs for celebrating Valentine’s day!
Would love it if you were to share them at my link party, Friday with Friends.
RR
Leslie J Watkins
Yes! Tell me how to join you there!
Pingback:
Lynne
What a great idea! I have never tried making these, but you have inspired me! Thank you for sharing!
So much fun to be on this Blog Hop with you! Pinned!
Leslie J Watkins
Thank you, friend! Loved the blog hop, too! Hope you give these a try…so good!
Tribe of Burton
These look delicious and I love the little marshmallows.
Leslie J Watkins
Thank you! Can’t wait for you to try these! They are soooo good!
Kim | Shiplap and Shells
I loved this so much Leslie! I’m all about anything that has to do with hot cocoa. Thank you for sharing at Charming Homes and Gardens. Pinned.
Leslie J Watkins
Thank you for the sharing and pinning! More to be made today with great nieces!
Marie
I never would have thought to make these! What a cute gift. I could see these being really cute as wedding favors/party favors.
Leslie J Watkins
OOOOOOhhhhh! I love the wedding idea!! A winter wedding with a hot cocoa bar? Or simply as favors? Yes, please!
Pingback:
Rachel Harper
These look so yummy. Can’t wait to share on Charming Homes & Gardens Link Party on Wednesday.
Rachel
Leslie J Watkins
Yay! Thanks for sharing!! They truly are wonderful…making them again today with great nieces!
Pingback:
Pingback:
Pingback:
Pingback:
Pingback:
Pingback:
Pingback:
Pingback:
Elizabeth
Leslie, this is sucha a sweet idea. I could not agree more, it looks much easier that making them the other way.
Leslie J Watkins
Thank you, Elizabeth! Getting ready to share this again! Just too good to keep this to myself! One of those great light bulb moments you have for sure…
Julie Briones
These hot cocoa stirs not only look delicious, but they are so pretty! I’m so glad your shared your post at Tuesday Turn About, Leslie! I’ll be featuring your post this week! Pinned!
Leslie J Watkins
Oh, thank you, Julie! They were truly fun to create and so much easier than hot cocoa bombs, right? Thank you for featuring me!
Cindy
Omgoodness, I love these so much Leslie! They are so much fun and I can’t wait to make them for my grandkids one day Pinning! BTW, congratulations on being featured on Tuesday Turn About!
Leslie J Watkins
Thank you! I was so over cocoa bombs and their perfection when I created these…just a perfect solution! I’d love to see them when you make them!
Pingback:
Nicolle
Leslie these are sooo cute! Just pinned the recipe!
Leslie J Watkins
Thank you! I love them so much better than the cocoa bombs! I’d love to see yours if you give these a try!
Pingback:
Leslie J Watkins
Oh, thank you for sharing!!! That makes my heart so very happy!
Pingback: